How To Remove Wall Plugs
How to Remove Wall Plugs: Step by Step Guide
Wall plugs, also known as wall anchors or rawlplugs, are commonly used to provide support and stability for screws and other fasteners. However, there are times when you may need to remove them, whether it’s due to a change in decor or repairs. Removing wall plugs can be a bit tricky if you’re not familiar with the process. In this article, we’ll guide you through the steps to safely and efficiently remove wall plugs without damaging your walls.
Detailed guide on how to remove wall plugs
Tiempo necesario: 5 minutos
How to remove wall plugs from a wall
- Gather the Necessary Tools: To begin, gather the following tools:
Pliers or a pair of needle-nose pliers
A sturdy screwdriver or a drill with a screwdriver bit
Sandpaper or a sanding block
Spackle or wall putty
A putty knife or a scraper - Examine the type
Take a close look at the wall plug to determine its type. There are typically two main types of wall plugs: plastic and metal. Plastic wall plugs are most common in residential settings, while metal wall plugs are often found in commercial or heavy-duty applications. Knowing the type of wall plug will help you choose the appropriate removal method.
- Removing Plastic Wall Plugs
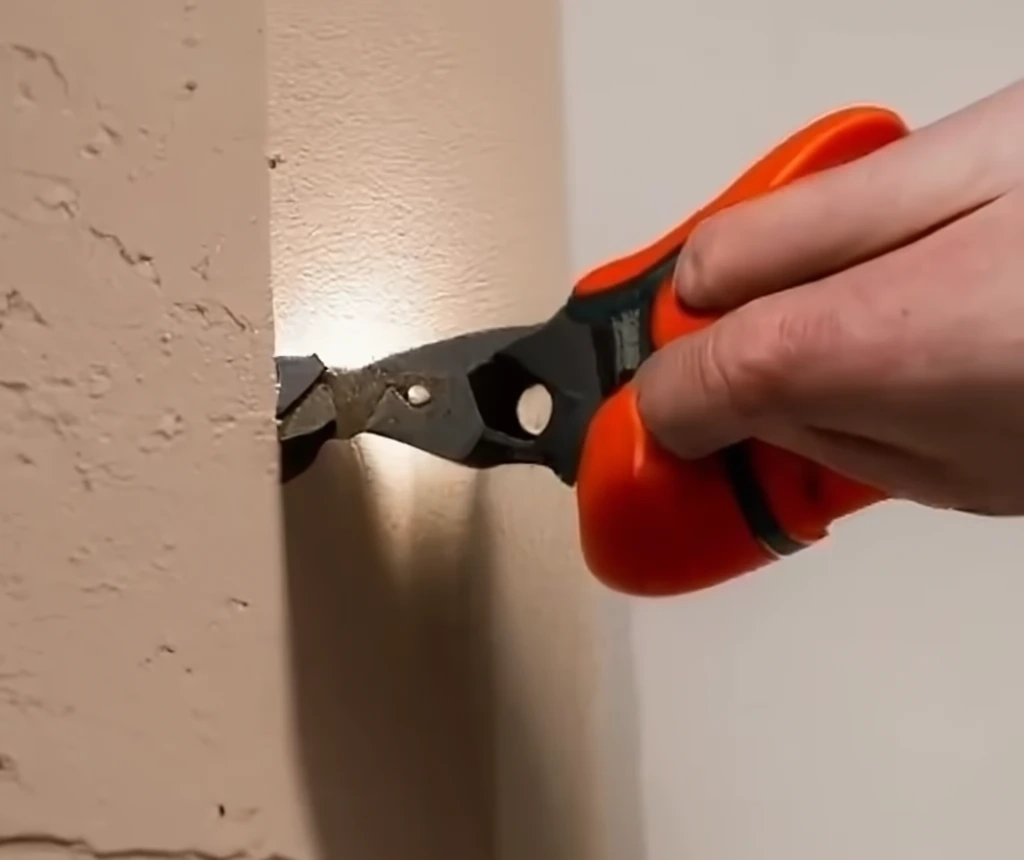
For plastic wall plugs, follow these steps: Grip the wall plug with a pair of pliers or needle-nose pliers as close to the wall surface as possible.
Gently and steadily pull the wall plug straight out of the wall.
If the wall plug is stubborn and doesn’t come out easily, you can use a screwdriver or drill to back it out. Insert the screwdriver or drill bit into the center hole of the wall plug and rotate counterclockwise until it loosens and can be pulled out. - Removing Metal Wall Plugs
For metal wall plugs, follow these steps: Locate the screw head inside the metal wall plug.
Insert the appropriate-sized screwdriver or drill bit into the screw head.
Rotate the screwdriver or drill counterclockwise to unscrew the wall plug from the wall.
Once the screw is removed, the metal wall plug can be easily pulled out of the wall using pliers. - Removing using a screw
If the wall plug is not too tight in the hole then it might also be possible to pull the wall plug out. using a screw. Insert the screw into the wall plug but only slightly in. Pull on the screw to see if the wall plug comes out. If the screw was too loose, then try again but insert the screw further in.
- Patching and Finishing
After removing the wall plug, you’ll likely be left with a small hole in the wall. Here’s how to patch and finish it:
Use sandpaper or a sanding block to smooth any rough edges around the hole.
Apply a small amount of spackle or wall putty to a putty knife or scraper.
Press the putty or spackle into the hole and smooth it out to create a level surface.
Allow the patch to dry completely as per the manufacturer’s instructions.
Once dry, sand the patched area lightly to create a seamless finish.
Finally, paint the patched area to match the surrounding wall, blending it in seamlessly.
If the hole is outside or in an area where can be water present, then use a waterproof sealant like Adiseal sealant and adhesive to fill the hole in. This will prevent any water going into the hole which could possible cause other damage.
Conclusion: Removing wall plugs can be a straightforward process if you follow the proper steps and use the right tools. By carefully removing the plugs, patching the holes, and finishing the surface, you can maintain the aesthetic integrity of your walls while preparing them for new décor or repairs. Remember to always exercise caution and take your time to avoid damaging the wall.
Safety considerations
- Eye Protection: When removing wall plugs, there is a possibility of small debris or fragments flying around. Protect your eyes by wearing safety glasses or goggles to prevent any injury.
- Electrical Safety: Before removing wall plugs, ensure that there are no live electrical wires or cables hidden behind the wall. If you’re uncertain about the wiring, it’s best to turn off the power supply to that specific area of your home or seek assistance from a qualified electrician.
- Proper Grip: When using pliers or needle-nose pliers to remove wall plugs, make sure you have a firm grip on the plug to avoid slipping and injuring yourself or damaging the surrounding area.
- Sharp Tools: Be cautious when using screwdrivers or drills to remove wall plugs. Ensure that the tools are in good condition and that you maintain control during the removal process. Accidental slips or excessive force can lead to injury or damage to the wall.
- Wall Stability: Depending on the condition of the wall and the type of wall plug used, removing the plug may cause some minor damage, such as small cracks or crumbling. Take care not to put excessive pressure on the surrounding area to prevent further damage.
- Working at Heights: If you need to work from a high location, such as on a ladder or a step stool, ensure that the ladder or stool is stable and secure. Maintain three points of contact at all times and avoid overreaching to maintain balance and prevent falls.
Remember to prioritize safety. If you encounter any challenges or are unsure about any aspect of the task, it’s always wise to seek professional assistance.
Common problems
When removing wall plugs, you may encounter some common problems. Here are a few problems you might face and their potential solutions:
- Wall Plug Spinning: Sometimes, when attempting to remove a wall plug, it may start spinning in place instead of coming out. This occurs when the plug’s anchor mechanism has disengaged from the wall, making it difficult to grip and remove.
Solution: To address this issue, you can try inserting a flathead screwdriver behind the plug and applying outward pressure while simultaneously pulling it out. This should prevent the plug from spinning and allow you to remove it successfully.
- Plug Breakage: Wall plugs, especially plastic ones, can become brittle over time. If excessive force or improper removal technique is used, the plug may break, leaving a portion stuck in the wall.
Solution: If a wall plug breaks, you can use a pair of needle-nose pliers to grip the remaining portion tightly and carefully pull it out. If the broken piece is difficult to grip, you can try using a small screwdriver or drill bit to create a small hole in the center of the broken plug and then use pliers to extract it.
- Damaged Wall Surface: Removing wall plugs can sometimes cause minor damage to the wall, such as small cracks, chipped paint, or a larger hole if the plug was forcefully removed.
Solution: After plug removal, you can repair the damaged wall surface by using spackle or wall putty to fill any holes or cracks. Allow the filler to dry, sand it smooth, and then repaint the area to match the surrounding wall.
- Difficulties with Metal Wall Plugs: Metal wall plugs may rust or corrode over time, making them more challenging to remove.
Solution: If a metal wall plug is stuck or resistant to removal, applying a penetrating lubricant, such as WD-40, can help loosen the rust or corrosion. Allow the lubricant to sit for a few minutes before attempting to remove the plug using pliers or a screwdriver.
- Hidden Obstacles: It’s possible that there may be hidden obstacles behind the wall, such as electrical wires or plumbing pipes, that could hinder the removal process.
Solution: Before removing wall plugs, it’s important to use a stud finder or other suitable tools to identify any potential obstacles behind the wall. Take necessary precautions to avoid damaging these elements. If you are uncertain about the presence of hidden obstacles, it’s best to consult a professional.
Remember, patience and careful execution are key when removing wall plugs. If you encounter significant difficulties or are unsure about the process, seeking guidance from a professional can help ensure a successful removal without causing further damage.
Common mistakes
When removing wall plugs, there are a few common mistakes that people can make. These mistakes can lead to damage to the wall or make the removal process more difficult than necessary. Here are some of the common mistakes to avoid:
- Using excessive force: One of the most common mistakes is applying excessive force when trying to remove a wall plug. This can result in the plug breaking apart or damaging the surrounding wall. It’s important to remember that wall plugs are designed to hold securely, so forcing them out can cause more harm than good.
- Not using the right tools: Using improper tools or using them incorrectly can make the removal process more challenging. It’s crucial to use the appropriate tools, such as a screwdriver or pliers, that fit the size and type of wall plug. This ensures a proper grip and minimizes the risk of damaging the plug or the wall.
- Neglecting to prepare the area: Before removing a wall plug, it’s important to prepare the surrounding area. Clear the area of any furniture or objects that might obstruct your access or cause damage if accidentally bumped or knocked over. Additionally, it’s a good idea to place a cloth or drop cloth beneath the plug to catch any debris or protect the floor or surface below.
- Pulling at an angle: When removing a wall plug, it’s crucial to pull straight out from the wall rather than at an angle. Pulling at an angle can cause the plug to loosen unevenly or get stuck, making removal more difficult. Applying even pressure while pulling directly outward is the most effective approach.
- Failing to repair or patch the hole: After removing a wall plug, it’s essential to properly repair or patch the resulting hole. Neglecting to do so can leave an unsightly or uneven surface and may compromise the stability of future wall installations. If the hole is outside or in an area where there can be moisture present like a bathroom, water can go into the hole and cause damage. Fill the hole with an appropriate waterproof sealant or patching compound, sand it smooth, and paint or touch up the area to match the surrounding wall.
By avoiding these common mistakes, you can ensure a smoother and safer process when removing wall plugs. Remember to be patient, use the right tools, and take the necessary steps to prepare and repair the area properly.
Types of wall plugs
There are several types of wall plugs or wall anchors available, each designed for different purposes and materials. Here are some common types:
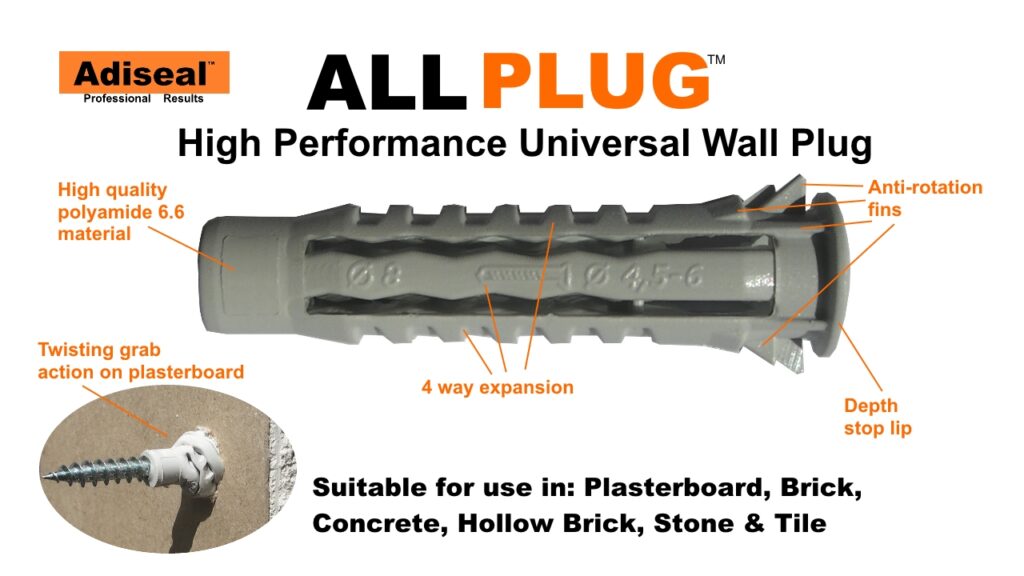
- Plastic Expansion Anchors: These are the most basic and widely used wall plugs. They consist of plastic sleeves with fluted sides and are suitable for lightweight applications in materials like drywall or plasterboard.
- Metal Hollow Wall Anchors: Also known as Molly bolts, these anchors are used for heavier loads in hollow walls. They consist of a metal sleeve that expands behind the wall when a screw is tightened, providing a secure hold.
- Self-Drilling Anchors: These anchors have a sharp point and are designed for easy installation. They can be used in drywall or concrete and do not require pre-drilling.
- Toggle Bolts: Toggle bolts are used for heavy-duty applications. They consist of a pair of wings that fold together and are inserted through a pre-drilled hole. Once inside the wall, the wings open up to provide a strong anchor point.
- Screw-In Anchors: These are simple and versatile anchors that can be directly screwed into a variety of materials like drywall, wood, or concrete. They typically have sharp threads and offer a secure hold.
- Plastic Ribbed Anchors: Ribbed anchors are commonly used for medium-weight applications. They have ridges along the body to grip the walls securely and are suitable for materials like drywall or plaster.
- Expansion Bolts: Expansion bolts are heavy-duty anchors used in concrete or masonry. They consist of a bolt with expandable sleeves that provide a secure grip when tightened.
Also check out our wall plugs for plasterboard.
Alternatives to wall plugs
It is also possible to attach items to a wall without drilling into it by using an adhesive instead. Try the record breaking strongest adhesive & sealant Adiseal to fix items to a wall. In an independent test by Ultimate Handyman, it was over 3 times stronger than the nearest competitor. You can see the adhesive test on YouTube.

Best drill bits
If you need to drill holes for wall plugs or anything else then we have new products which are the best metal drill bit and best masonry drill bit. Both products drill faster and drill more holes than any other bit. The masonry drill bit is also a multi-material drill bit suitable for drilling brick and also drilling concrete as well as other materials.
Frequently asked questions about removing wall plugs
To remove wall plugs, you’ll need pliers or needle-nose pliers, a sturdy screwdriver or drill with a screwdriver bit, sandpaper or a sanding block, spackle or wall putty, and a putty knife or scraper.
To remove plastic wall plugs, grip the plug with pliers or needle-nose pliers close to the wall surface and pull it straight out. If it’s stubborn, you can use a screwdriver or drill to back it out by rotating counterclockwise.
To remove metal wall plugs, locate the screw head inside the plug and use the appropriate-sized screwdriver or drill bit to unscrew it counterclockwise. Once the screw is removed, the metal plug can be pulled out using pliers.
After removing the wall plug, use sandpaper or a sanding block to smooth any rough edges around the hole. Then, apply spackle, wall putty or waterproof sealant using a putty knife or scraper, creating a level surface. Allow the patch to dry completely before sanding it lightly and painting over it to match the surrounding wall.
It is generally not recommended to reuse wall plugs after removal. Wall plugs can lose their structural integrity and effectiveness over time. It’s best to use new wall plugs for secure and reliable fastening.
Suhail Matadar
Suhail Matadar has extensive experience in the construction industry as an electrician, involved in installing, inspecting, and testing electrical systems in various projects. He excelled in sales, working for a major UK wholesaler, selling construction products to professionals and the DIY market. Suhail's background includes working at a leading home emergency repair company dealing with trades people. With a BEng (Hons) degree in Electronic Engineering, Suhail has worked with PLCs in the nuclear fuel manufacturing industry. During his studies, he gained practical experience at a chemical manufacturing company known for producing award-winning cleaning, hygiene, and livestock protection products for over a century. Currently, Suhail runs a global business specialising in supplying, researching, testing, and distributing construction products like adhesives, sealants and drill bits.